One of my favorite things about the admin theme with WordPress is the new Dashicons icon font. It brings a sense of standard and uniformity to dashboard icons with its distinctive look and vast array of icons for theme and plugin authors to choose from and use with ease.
However, it seems that not all plugin and theme authors have jumped on the Dashicons bandwagon. They insist on using their own custom image icons that do not fit in with the new design at all. This includes things such as colored icons which do not adapt to the different color schemes included with WordPress. Other authors do not set an icon for their menu or post type, resulting in many of that same thumb tack post icon or generic gear icon. This leads to a messy dashboard, which I do not like.
Fortunately, it is easier than ever to override the author’s choice for the icon with a Dashicon of your choice – all with only a few lines of CSS.
Dashicons is the icon font used officially in WordPress admin. What’s great about it is that you can add some visual cues on your website without bloating it up. Visuals like images increase load times and don’t scale well, while SVGs require you to read up a bit to actually put it to use Today we’re going to show you how you can get these font icons installed on your WordPress project.
Step 1: Enqueuing the script
To get your WordPress site ready, you’ll need to open up your child theme’s functions.php file and insert the following lines of code at the end.
add_action( 'wp_enqueue_scripts', 'load_dashicons_front_end' );

function load_dashicons_front_end() {

}
Step 2: Using dashicons
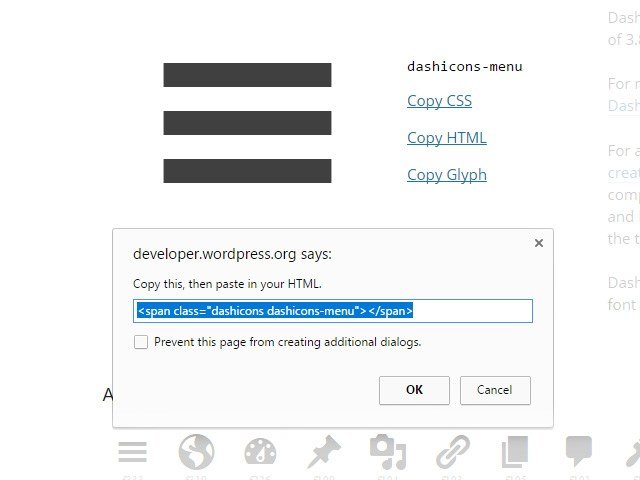
Head over to this site and pick an icon that you’d like to use. Click on ‘Copy HTML’ and use that snippet of code and paste it into your HTML, and with that, you are done! Simple isn’t it.

Extra Step: CSS Method
Instead of inserting it via HTML, you can also insert dashicons using CSS. Return to this site and pick an icon. This time, click ‘Copy CSS’ and insert that code into your own CSS file. Make sure to paste the code in the CSS before:selector.
Here’s a sample code of how this will look like:
.web-link:before {

font-family: "dashicons";

content: "\f319";

}
Menu icons?
Head over to the Dashicons website and pick out an icon you want. Select it and click “Copy CSS” to copy the necessary code for using that icon in CSS.
The next is to obtain the ID of that menu. To do so, use your browser’s Inspect Element tool. You’re looking for something like toplevel_page_{menu-slug} or menu-posts-{post_type}.
To add the Dashicon to the menu, use this CSS. Remember to substitute toplevel_page_{menu-slug} for the menu ID and content: '\f174'; for the Dashicon CSS code.
#adminmenu #toplevel_page_{menu-slug} div.wp-menu-image::before {
    content: '\f174';
}
If you’re just overriding another Dashicon, then the above is all that is needed. If the menu already has an image icon embedded in the HTML, you will need to add this CSS:
#adminmenu #toplevel_page_{menu-slug} div.wp-menu-image img
    display: none;
}
If the menu already has an image icon applied through CSS background images, use this CSS instead of the above:
#adminmenu #toplevel_page_{menu-slug} div.wp-menu-image {
    background: none !important;
}
You can include the CSS code in a plugin, theme’s functions.php or code snippet by wrapping it with this PHP code:
function replace_admin_menu_icons_css() {
    ?>
    <style>
        /* CSS code goes here */
    </style>
    <?php
}

add_action( 'admin_head', 'replace_admin_menu_icons_css' );
And with that, you are now on the road to using WordPress dashicons! Do you use Dashicons or do you prefer SVGs? Let us know which method you use and why down in the comments below.